1
2
3
4
5
6
7
8
9
10
11
12
13
14
15
16
17
18
19
20
21
22
23
24
25
26
27
28
29
30
31
32
33
34
35
36
37
38
39
40
41
42
43
44
45
46
47
48
49
50
51
52
53
54
55
56
57
58
59
60
61
62
63
64
65
66
67
68
69
70
71
72
73
74
75
76
77
78
79
80
81
82
83
84
85
86
87
88
89
90
91
92
93
94
95
96
97
98
| module USART(
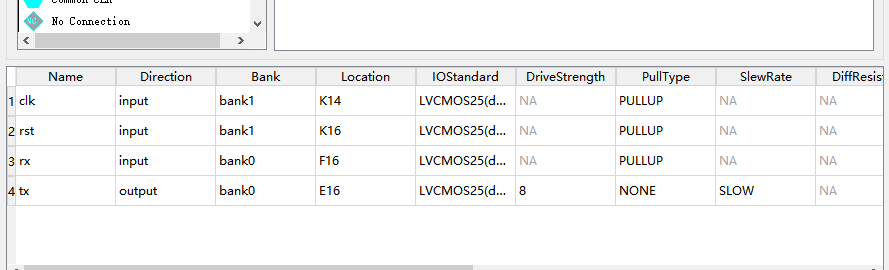
input clk, //24Mhz
input rst,
input rx,
output reg tx
);
reg[7:0] buff;
reg[7:0] rx_shift;
reg[7:0] tx_shift;
initial begin
tx = 1;
buff = 0;
rx_shift = 0;
tx_shift = 0;
end
wire clk0;
PLL pll(
.sub (32'd1250),
.clk (clk),
.rst (rst),
.clk_out (clk0)
);
integer rx_i = 0;
integer tx_i = 0;
integer rx_flag = 0;
integer tx_flag = 0;
integer send_flag = 0;
always @(posedge clk0 or negedge rst)begin
if(rst == 0)begin
rx_i=0;
tx_i = 0;
rx_flag=0;
tx_flag = 0;
tx = 1;
buff = 0;
rx_shift = 0;
tx_shift = 0;
end
else begin
case(rx_flag)
0:begin //起始位
if(rx==0)begin
rx_flag=1;
end
end
1:begin//数据位
rx_shift = rx_shift + {rx,7'd0};
if(rx_i < 7)begin
rx_shift = rx_shift >> 1;
end
rx_i = rx_i + 1;
if (rx_i >= 8)begin
rx_flag = 2;
rx_i = 0;
end
end
2:begin//结束位
if(rx == 1)begin
buff = rx_shift;
rx_shift = 0;
send_flag = 1;
rx_flag = 0;
end
end
endcase
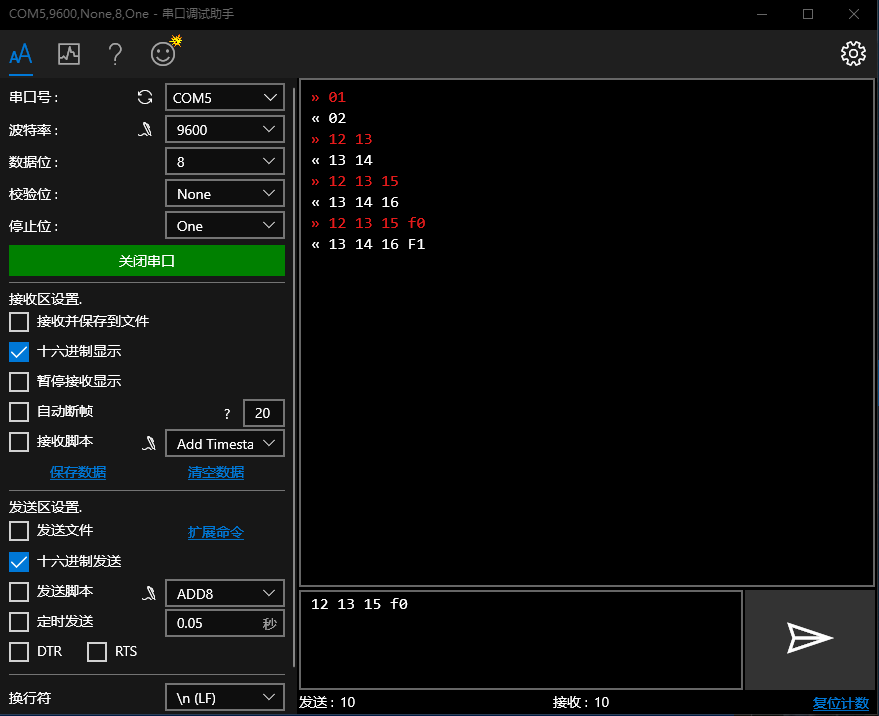
if( send_flag==1 )begin
case(tx_flag)
0:begin
tx_shift = buff + 1;
tx = 0;
tx_flag=1;
end
1:begin
tx = tx_shift[0];
tx_shift = tx_shift >> 1;
tx_i = tx_i+1;
if(tx_i >= 8)begin
tx_flag = 2;
tx_i = 0;
end
end
2:begin
tx = 1;
tx_flag = 0;
send_flag = 0;
end
endcase
end
end
end
endmodule
|